Thursday, January 31, 2013

Boo to the flu!

It's been going around as they say and last week it found me: the flu! I've pretty much been incapacitated since last Tuesday. The only reason there were posts on this blog last week is because I had preplanned them, so let's all praise that little technical gem that Blogger offers, otherwise it would have been quiet for two weeks.

The weapons to fight the flu with. They don't help.

Anyway I didn't have anything planposted yet for this week so that's why it's been quiet around here and also why I haven't been coming to your blogs and sites and discussion groups. I just thought I'd post this so you all knew where I went off to. 

The nest I built on my couch when I was well enough to at least read a little again.


I did start work again today for the first time in eight days and that's pretty much all I have energy for right now. So...I hope you will understand the little break in blogging and artsy stuff. Next week I will be back (unless the flu finds me a second time, but I'm trying to hide from it with a vengeance). See you then!

Until then I hope you all are having a wonderful artsy time without me.


Friday, January 25, 2013

Another beautiful lady

My practice of drawing beautiful ladies in beautiful dresses continues. I keep using the same wedding magazine as my supply of models, even though the eventual drawing is not really anything like the original. It's just to inspire a pose and a shape. The rest is all me...sort of...;-)


This time it's not a full figure pose, but I liked the image so much that I just had to use it. I drew the girl in pencil and then went over the lines with a drawing pen. Then I did a sort of underpainting in brush markers and defined the details and shadows with a top layer in coloured pencil. I then did the background in a light watercolour wash with a top of coloured pencil and some butterfly stamps.

Here's some more detailed shots:


I really like the effect of the pencils on top of the markers. I wasn't sure it would work, but it did. I will definitely try that technique again. Actually that's one of the other fun parts in this series: the different ways there are to colour in these ladies.

Hope you like her and wish you all a wonderful and artsy weekend!

Wednesday, January 23, 2013

The White Book

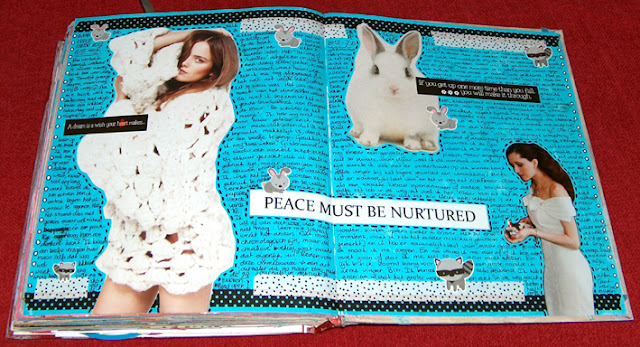
When the Moon Journal was drawing to a close it was time to think about which book would come after it. I contemplated several books, but in the end decided on a square Seawhite of Brighton sketchbook, the same type as I use for my regular sketchbooks.

Before I start a new book I like to prep it's pages and cover, but I wanted to keep the next book really simple and plain. So all I did was this:


I painted the original black cover white with several layers of gesso. After that I had a book with white pages and a white cover and I had no choice but to call it the White Book. (My book names are always so obvious, haha.) I put its name on the cover with a blak paint marker and that was that. The book was ready for use. No fancy colours, no nothing.

My intention with this book was to work with its simplicity and to give myself the challenge of working with white backgrounds. I filled the first spreads in the last few days before my vacation. Here's how they turned out. 


I don't know if you can tell, but life was really hectic in those days. I had so little time to play with my journal that I kept everything really simple. Especially the third spread which is just a couple of postcards and writing.

During my vacation I did a lot of thinking about my journaling and writing and how one affects the other and that will take this book into a different direction in the coming year, but that's something I want to talk about next week. Let me tell you though that since that last spread I actually have not worked in this book again yet. There's a reason for that, but that's part of a post I want to write next week when I talk about my plans and ideas for next year. So again I ask you to bear with me. ;-)

For now I hope you enjoy this peek into the new journal and wish you all a wonderful and artsy Wednesday.

Monday, January 21, 2013

The last of the Moon Journal

I really want to start talking about my plans for the coming year, but I feel I haven't wrapped up the last one yet unless I show you all the stuff I did at the end of that year and that's what I intend to do in this weeks posts. So bear with me, okay?

One of the things you still need to see are the last spreads from the Moon Journal. I promised these to you weeks ago, but the holidays and the Quinn Book got in the way. (in a good way mind you)

You remember the Moon Journal right? It was an altered atlas that I worked in for the bigger part of last year, nine months in total to be exact. It was my daily journal, or should I say semi-daily journal? I had a really hard time with it sometimes. Keeping up a journal practice is wonderful, but when a book is this big and requires this much work I also can find it tedious from time to time.

Still, on December 12th I finally finished up the last spread and could close this book that I loved to work in, but that was a huge challenge to finish. I'm really glad I did though.

Here are the last eight spreads for your enjoyment (and my closure!).


The fun thing about working in an altered book is that you first kind of break it down and then bring it back to life. When I was finished prepping this atlas I had taken out about half of its pages and it looked really sad and thin. But after filling it, it is now much thicker than it ever was in its original state!

Here are some pictures of the finished journal standing up to give you an impression of how luscious and colourful it became in the end. 


I'm pretty proud of it actually! But I must confess I am also relieved it is full. Nine months is a long time for me to work in one book as a daily journal. I'm not sorry I did it though. It was definitely worth it.

I hope you enjoyed these last images of this book and I also hope you enjoyed following me through the past year as I filled it up spread by spread. Thanks for all your wonderful comments on it as I worked on it, it really kept me going. Now I will put the journal to rest besides all those that went before it and from time to time I will pick it up and enjoy its pages.

Wishing you all a wonderful and artsy week!

Friday, January 18, 2013

Photography Friday

Time for another Photography Friday! Enjoy!

This pond keeps seducing me to take pictures of it from all angles.

I was fascinated by the star shapes on the inside of these cut down tree stems.

A tree convention in the midst of the forest.

My assistant glued himself to the wall.

Everywhere are remnants of the heavy rain fall of the past months.

My Christmas gift to myself. The full set of Pitt Big Brush Markers. Wheee!

My love affair with empty tree branches continues....

....and continues....

....and continues.

Oh art supplies, you are so pretty and colourful!

We had snow...

...actual real white snow!

Wishing you all a wonderful and artsy weekend! Make it a good one!

Wednesday, January 16, 2013

Writing in the Quinn Book - a little envelope tutorial

When I went on my personal little art retreat during the holidays I knew I wanted to write and I knew I wanted to write a lot. You may think that I do a lot of writing already in my journals (I know you do), but I really wanted to write everyday for as long as I possibly felt like it. And since words always flow from my pen like water from a faucet I knew that I couldn't be confined by a journal spread to do so. For example, here's what I wrote in one stretch on one typical day:


At that rate if I wrote directly into the Quinn Book it would not only be filled without any art, it would even be too small! So I decided on an alternative. I wrote on simple notebook paper and would figure out along the way how to ad the writing to the final journal.

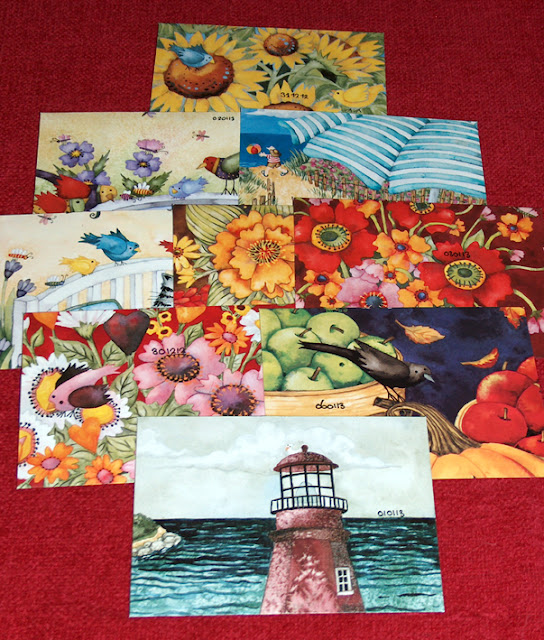
During the vacation I remembered I still had a whole stack of beautiful old folk art calendars that were given to me by my cousin. So I decided to pick one and make beautiful envelopes out of them. That was pretty easy. The imagery was gorgeous. All I had to do was cut and fold. Here's the result:


The only thing I added to them was the date of the writing in marker, so I would know when I wrote that particular entry. To keep things even more simple I just added the envelopes to the Quinn book in the left over spreads with a paper clip. I didn't feel it needed anything more than that. All I wanted was just to keep the writing and art of one vacation together and this worked fine enough for me. 


Now as a little bonus I thought I'd show you how to make your own pretty envelopes. It's really easy and fast and it really ads a little something special to your snail mail (or journal).

PRETTY ENVELOPE TUTORIAL

What you need:
- any beautiful sturdy paper you want to make an envelope out of
- one unused envelope that you want to emulate (there are also templates available online)
- a pen or pencil
- scissors
- glue
- a ruler
- an embossing pen or anything else you can emboss a fold with

The last two are not necessary, but I find they really help in keeping the folds straight.

For the Quinn book I used an old calendar, but for this tutorial I used a torn atlas page (left over from my altered atlas journals).

Carefully fold open the envelope you want to use as a template.

Trace the open envelope on the 'inside' part of the paper. Then cut it out. Make sure the right side is up.


Now with a ruler and embossing pen I like to mark the folds. It makes the folding so much easier.
 
Fold the envelope and glue the sides together.

And voilá! There's your brand new envelope!

If you want to make a lot of envelopes I would suggest making a more sturdy template out of cardstock or acetate before you start tracing. Ready made envelopes will not hold up to constant tracing, they are too flimsy. But for a small set it will do.

Of course you can also use your own decorated paper or decorate an envelope of ready made paper much further before you fold it. You can paint, collage, draw, stitch. Anything you like to ad a personal touch.

Hope I gave you a nice idea for your journal or mail art!

Wishing you a wonderful and artsy Wednesday!

Monday, January 14, 2013

The Midwinter Journal 2012/2013 aka The Quinn Book - part two

I hope you all had a wonderful weekend and are looking forward to the second installment of the Quinn Book that I filled in my vacation. (You can read why it's called that in my previous post.)

While I was working in this book I discovered that I really enjoyed using stencils and materials in a different way than the obvious one. I love using premade art supplies (there is so much gorgeous stuff out there), but I don't like a premade look, so it became my challenge to get a bit of an abstract layout with ready made supplies. It was a lot of fun to play that way and definitely something I want to explore further. You know...with the thousand other things I want to explore further some time someday somehow. ;-)

So here's some more spreads!

This is my absolute favorite spread in the entire book!

I never thought of using rub ons and a circle template this way before.

I don't know if you can tell, but the clothes on these paper dolls are cut out from paper. These were done from stencils too.

Gouache (Talens) and brush pen (Pitt), hello my darling circles and ribbons!

The rose stickers were actually intended to stick on your bike!

I don't know if you can read it, but it says "The child is always hungry". Ain't that the truth! ;-)
 
I had a lot of trouble getting this one right, but it worked out in the end.
 
The card on the left was made by my friend Chanou. A little origami christmas tree!

And that concludes the artsy part of the journal. As I said last time I also added a bunch of photographs, but those were hard to take a snapshot of, since the glare was too prominent. I filled the book about two thirds with images and art. The rest of the book has been reserved for my writing. How I did that I will show you coming Wednesday!

Until then I wish all of you a wonderful and artsy week!